How to Hand-Wash Clothes While Traveling
There are few bigger travel bummers than the ripe, unpleasant scent of unwashed clothes, especially when you’re smack-dab in the middle of a trip of a lifetime. Sometimes it’s essential to pack less clothes than a trip requires, especially if you’re backpacking or on a longer sojourn. Who actually owns a month’s worth of underwear? But you still need fresh, clean clothes to get you through your trip. It can be difficult to navigate a laundromat in a foreign country, it’s impossible to find a washing machine on the trail, and laundry service is notoriously expensive on cruise ships and in most hotels. Hand-washing your clothes is the way to go. This guide on how to hand-wash clothes while traveling shows you the ropes (and clotheslines) so you can save space, money, and—possibly, your nose.
How to Wash Clothing by Hand in a Sink
Step 1: Fill the Basin and Add Detergent
Fill a clean (wipe up those toothpaste stains!) sink or a bathtub with very warm water. It should be comfortable enough to submerge your hands in, but not so hot that it will make colors bleed. (We recommend washing whites separately regardless). As the sink is filling, add some soap, detergent, or even dish soap if you’re not washing delicates. We love Castile soap because you can use it for pretty much anything—from washing the floor to washing yourself, plus it’s completely safe on clothes. It’s concentrated so you only need a few drops (seriously, or you might never get the soap out). This also means you can get away with packing a small bottle. Pro tip: If you can’t find the sink stopper, a plastic lid (or even the lid of a jam jar) can work in a pinch.
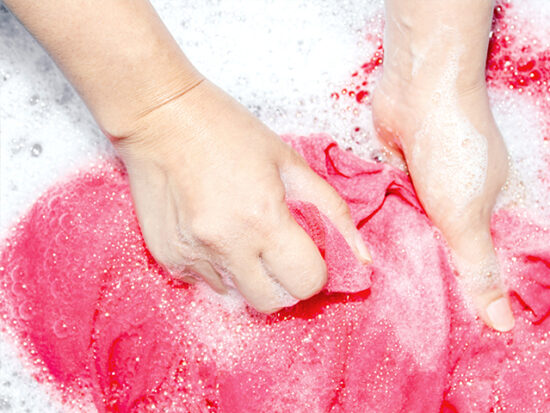
Step 2: Submerge, Swirl, Scrub
Right before you submerge your clothes, take a look at clothing tags and make sure hand-washing is A-OK (better yet, do this before you pack and leave dry-clean only items at home). You’ll also want to be aware of the fabric type and handle any delicate garments—like wool, silk, or lace items—more gently. Submerge your clothes in the water, but don’t overstuff the sink—we recommend only washing a few garments at a time. Next, swirl, swish, and/or squish your clothes around in the soapy water for a couple of minutes to distribute the soap. If you’ve got delicates in there, don’t go at this step too hard and misshape your clothes. Stretching and pulling on wet fabric is another no no. If you’ve got a stubborn stain or particularly odorous armpits, give them some extra love—rub the fabric against itself (or with an extra toothbrush), USING additional soap if need be.
Step 3: Soak
If you don’t have time for soaking, you can skip right to the rinse stage, but otherwise let the clothes sit in the soapy water for a few minutes (or up to a half hour if they’re really soiled, stinky, or bulky). If the water is visibly dirty by the time you get to the soaking stage, refill the basin with fresh water and soap and repeat this step. Campers and hikers, we’re looking at you.
Step 4: Rinse
The preferred method for rinsing garments is individually under cold, running water until the water runs clear and free of suds. A removable showerhead is great for this, but you can also do it under the faucet. If you have a limited water supply, just refill the sink with cold water and swish or knead the clothes around in the water. It’s possible you’ll need to do this more than once to get out all of the soap. Remember to use a minimal amount of soap to begin with, or you’ll be rinsing for days.
How to Wash Clothing by Hand Without a Sink

For situations sans sinks, like camping or backpacking, consider a portable wash bag, like this popular pick from Scrubba. It packs down small for easy portability, includes simple instructions on the bag itself (easy), and doubles as a dry bag. It’s a favorite among serious outdoors people—you can even use it in a river or stream.
Step 1: Fill Bag With Dirty Clothes, Water, and Soap
Fill the bag up to 40% full with warm water and some soap (remember, a little soap goes a long way when it comes to hand-washing), adjusting the water level to accommodate the volume of clothes you’re washing. As a rule of thumb, the water should be comfortable enough to submerge your hands in, as this temperature offers a good balance between getting your clothes clean and preventing color bleeding. As with sink washing, we recommend you read any of your clothes’ washing instructions before putting them in the bag and keeping whites away from colors. Don’t overstuff the bag. A couple of T-shirts and pairs of underwear is about the limit, and you may have to wash bulkier items one at a time.
Step 2: Roll and Clip
Roll the bag down several times and then clip it closed so that no water gets out.
Step 3: Deflate
Deflate the bag with the valve to get all the air out. Don’t forget to close the valve when you’re done or you’ll get wet in step 4!
Step 4: Swish
Rub and squash the bag to distribute the soap and clean the clothes. The bag is texturized inside with an inner washboard to help facilitate scrubbing. A quick 30 seconds will do a decent wash, but go for the full three minutes if your clothes are particularly dirty or bulky.
Step 4: Rinse & Drain
Open the bag and empty out the water (be sure to grab your socks first!). If you have access to cool running water, you can rinse the clothes out under the water until the water runs clear. Otherwise, refill the bag with cool water and rinse the clothes within the bag itself by swishing them around. Voila! Clean clothes without a sink.
How to Dry Hand-Washed Clothing
While some hand-washing gurus suggest you never wring out a garment, we highly recommend gently wringing clothes to any piece that can withstand it. Wringing clothes can drastically reduce drying time. After very gently wringing out (but don’t pull hard or stretch it from both ends) your garment, don’t forget to reshape it so it doesn’t dry wrinkled or warped. Hang or lay clothes out immediately after washing (garment tags usually indicate which way to go). If you used a wash bag don’t forget to turn that inside out and dry it, too. Remember, the more air you get around an item, the faster it will dry. So hang or lay clothes outside, near open windows, or in front of a fan, if possible.
Lay Flat
Some items—knits in particular—should lay flat to dry. This is because their fibers are prone to stretching from the weight of hanging them while wet. You can improvise how to lay these out—lay them across several rungs of a drying rack, over a big (clean) rock, on top of a towel on a bed, or on the floor (don’t get a wood floor wet, though).
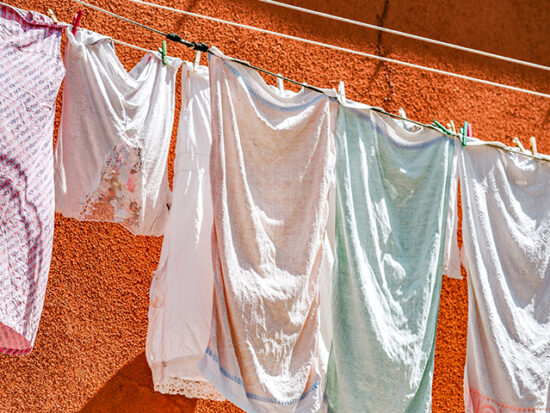
Hang Dry
You can also dry items by hanging them on a drying rack, on a clothes hanger, over a cool radiator, or on a clothesline. Remember that some items, particularly knits, can stretch out when drying or get bumps in the shoulders from a hanger. Many cruise ships and some hotel rooms have retractable clotheslines in the shower just for drying, or you can BYOC: bring your own clothesline. Simply hang your clothes over clotheslines, and using clothespins allows for more airflow around each garment. Throwing a few clothespins in your bag might be worth the faster dry time.
Drying Hacks
- If a garment is too delicate to hand-wring or you want to wring out just a little more water from a slower drying item (like a wool sweater), roll it up tight in a microfiber towel and press. The towel will absorb some of the water, and the microfiber itself will dry quickly. Unroll and dry the garment as you usually would.
- Place clothes in a sunny spot. Note: if you do this on the regular, colors will fade.
- Many European hotels (even the budget ones) have heated towel racks. This is a great place to hang-dry clothes!
- Consider packing at least some clothes made with quick drying materials, like quality nylon and polyester blend shirts or base layers. Remember, cotton takes the longest to dry (and tends to air dry stiffly).
- In a pinch, use a hotel hair dryer to speed along the drying process. This is particularly useful if your item is almost, but not quite, dry.
- On a warm day when you’ll be outside, you can throw on an almost-dry item on and let it dry while you’re wearing it.
Drying-Time Expectations
Drying times depend on a lot of variables, including the temperature, humidity, and location you’ve hung your clothes. But one of the biggest factors is fabric type. Some nylon or polyester pieces can dry in as little as a half hour. A cotton T-shirt or denim jeans might dry overnight—or longer, depending on the circumstances. Think about fabric type as you’re hanging clothes, choosing more premium spots (like those in front of an open window) for fabrics that are slow to dry.
And Don’t Forget…
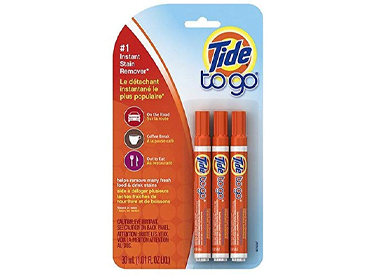
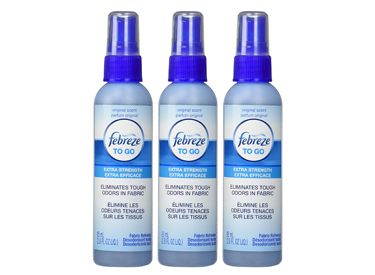
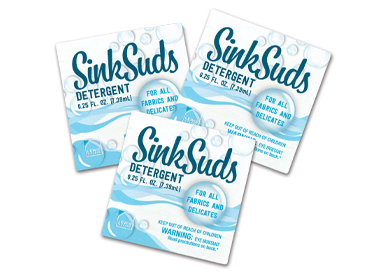
Make travel hand-washing and clothing care easier on yourself with a few smartly packed accessories. Tide To Go Instant Stain Remover Pens are the holy grail as your first defense against stains like grass, blood, and red wine. Dab the product on the stain as soon as you can, and it should lift out much easier when you wash the item. To make slightly smelly jeans and sweatshirts last an additional day without washing them, give them a spritz of Febreze. This instantly refreshes and removes odors at the source. SinkSuds Travel Laundry Detergent is TSA-approved and pre-measured and for small loads of laundry—but it has the cleaning power of whatever you buy in bulk at home.
Related Stories
- The 10 Best Garment Bags to Up Your Packing Game and Stay Wrinkle Free
- The Best Bags to Use as Your Personal Item
All products have been hand-picked by our writers and editors. Items purchased through links may earn us a commission.